POWERFLEX BUSHING PAGE


This page contains: Click on any picture for a larger version.

Front swaybar bushing comparison
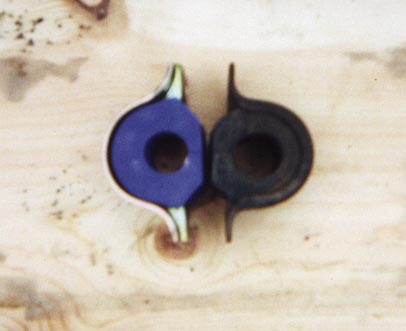
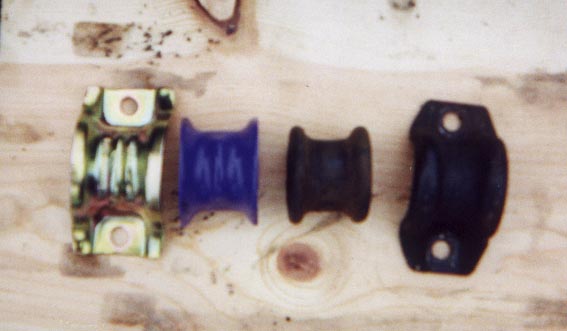
Here is a comparison of the stock front swaybar bushing versus the Powerflex bushing and later style bushing bracket. You will need to get the later style bracket if you have an 85 to 87(?) XR. You can get them from 88-89 XRs or from OPMD which is where I got mine.
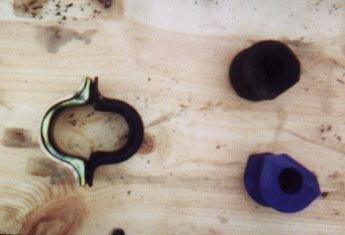
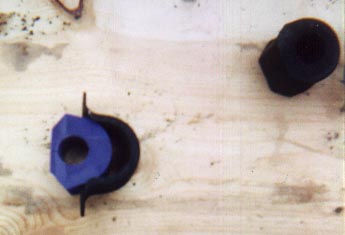
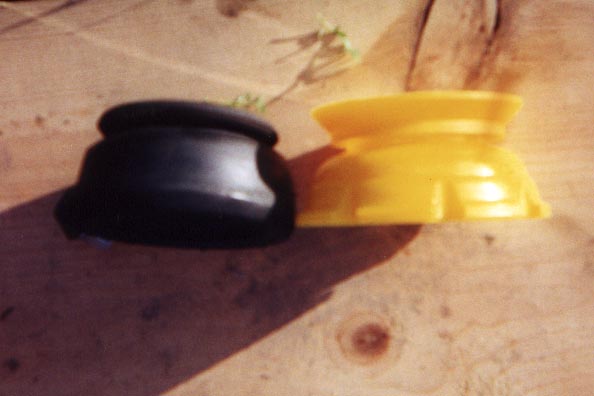
Here is a side shot showing the difference in the brackets. You can see why the new bushing will not fit the old bracket.

Back to the top


Upper strut mount comparison
Here are a couple pics of the Powerflex upper strut mount bushing compared to the stock bushing. You can see it is a two piece bushing. Rumor has it that the earlier kits had another spacer in them that went between the upper and lower plates that sandwich the mount.
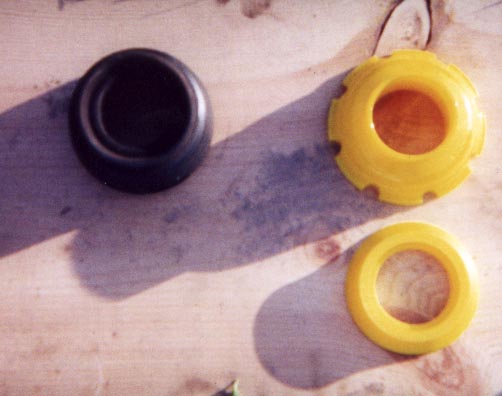
Back to the top


Front control arm Powerflex bushing install

This installation is not too difficult and can be completed in an afternoon. This installation will change your camber (gives less negative camber) and toe (toe-out) settings and give much better handling. An alignment is a must after installation (see notes)

Materials and tools needed:
Procedure:
  1. Jack up the front of the car and put jackstands under the frame. Remove the wheels.
  2. Remove the cotter pin from the ball joint and loosen the nut (do not remove) with a 19mm wrench.
  3. Remove the nut on the end of the sway bar with the 15/16 (?) socket
  4. Remove the nut and bolt (17mm) through inner control arm bushing. A hammer and screwdriver helps in removal of the bolt.
  5. Slide inner control arm out of cross member.
  6. Remove outer control arm from sway bar.
  7. Loosen ball joint nut until it's flush with the top of the ball joint threads. Using the 3" extension, hit the top of the nut with a hammer to loosen ball joint. Remove nut.
  8. Remove lower control arm.
  9. Inspect the ball joint boot for rips. If ripped, make sure the ball joint is OK. Clean the boot and put some silicone over the crack - let dry (I had to do this). This is just a temporary solution. You should replace the boots.
  10. Mount the control arm in a vise. Use a screwdriver and hammer to pry the outer bushings out.
  11. Use the gear puller to push the inner bushings out.
  12. Clean out the control arm bushing areas.
  13. Push the new bushings in. A press is not required, but a vise can help if they are stubborn.
  14. Lube the steel inserts with the provided grease. Push the steel inserts in. Again, a vise can help.
  15. Lube up the ends of the bushings.
  16. Put one of the washers on the sway bar.
  17. Insert the ball joint first, then the outer bushing onto the sway bar, then hammer (gently) the inner bushing into place in the cross member. Don't worry, it won't line up - yet.
  18. Tighten the ball joint and insert a new cotter pin.
  19. Put the other washer on the sway bar and put the new nut on - do not tighten completely
  20. Do the other side.
  21. Using the come-along, attach it to the sway bar directly behind the control arms. Tighten until one of the inner holes line up. If the come-along slides back on the sway bar, that is fine, it will still work, it will just be a little harder. Use a screwdriver and/or a hammer to help position the bushing into place. Insert bolt and new nut - do not tighten completely.
  22. Do the other side - remove the come-along.
  23. Put the wheels back on the car.
  24. Remove the jackstands and lower the car.
  25. Tighten the swaybar end nuts, and the inner nuts.
  26. You are done - go get an alignment.
Notes:
1.Here are some numbers from the measurements I took before and after the bushing install. It is important to note that these measurements were not taken on level ground, but they were taken in the same spot (before/after). The amount of change is what should be noted, not the actual numbers. Another item to not is that these are not the most accurate numbers. They were done with a large square placed on the ground and measurements taken at the top and bottom of the rim with a 1/32" division ruler. I am guessing +/- 1/32" accuracy, but that is equal to +/- 0.12° My tires are also toed-out now. Get an alignment, get an alignment, and, oh yeah - get an alignment.

Before Measurements: After Measurements: Change:
Front-Drv side 2.03° 1.43° 0.60°
Front-Pass side 0.96° 0.72° 0.24°
Rear-Drv side 3.58° ----- -----
Rear-Pass side 3.10° ----- -----